How to Log In and Assign a Vehicle to Your Carrier for Secure Vehicle Transfer
Secure Vehicle Transfer is Manheim’s digital handoff process for vehicles picked up at a Manheim location. Because Manheim is the custodian releasing the vehicle, there’s no dealer on the other end authorizing pickup, the only two parties involved are you, the dealer taking possession of a vehicle you purchased or reclaiming one that didn’t sell (a No Sale), and the carrier you’ve contracted to physically retrieve it. This article covers how to log in and assign a vehicle to yourself or to a driver so they can complete a secure pickup.
Note: This process runs on its own portal, a separate web address from Manheim.com, though it uses the same Manheim.com username and password. You’ll sign in with your usual Manheim.com credentials, just not at the usual Manheim.com address.
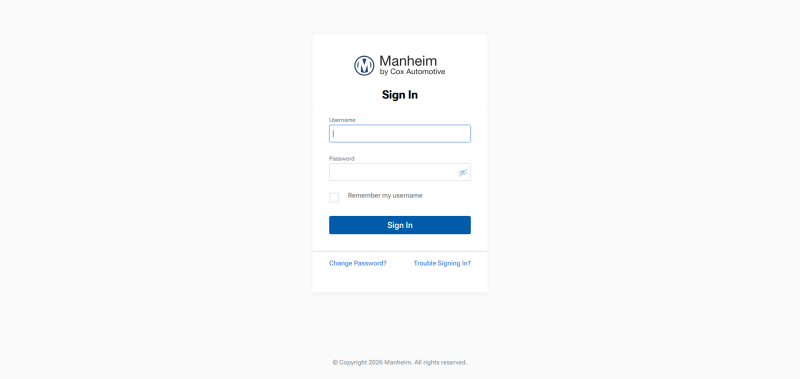
Go to https://vap.awsdigitalvehrel.manheim.com/ and sign in with your Manheim.com username and password.
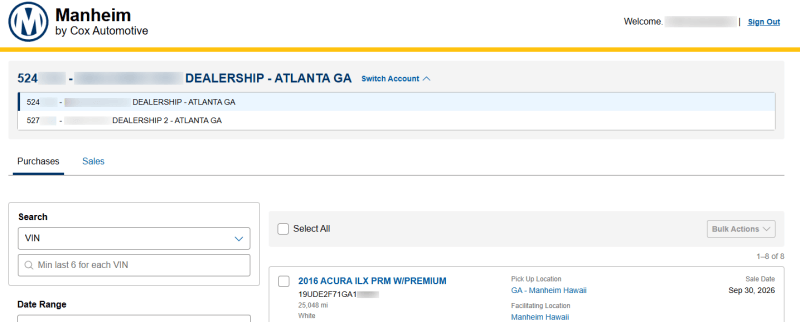
If your login is associated with more than one dealer account, select Switch Account and choose the correct one. If you only have one account, you’ll go straight to your vehicle list.
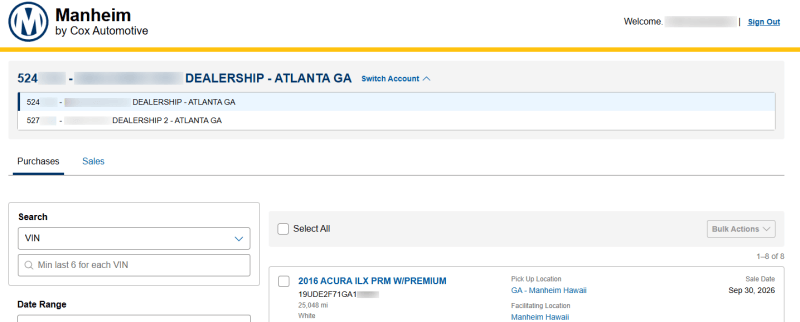
Use the Purchases tab for vehicles you bought, or the Sales tab if you’re reclaiming a vehicle that didn’t sell at auction (a No Sale). Use the Search panel on the left to narrow either list by VIN, date range, assignment status, pickup location, or vehicle details like year, make, and model.
Note: A No Sale reclaim uses this same Secure Vehicle Transfer process, just from the Sales tab instead of Purchases. You assign the pickup to yourself or a driver exactly the same way, covered starting in Step 4.
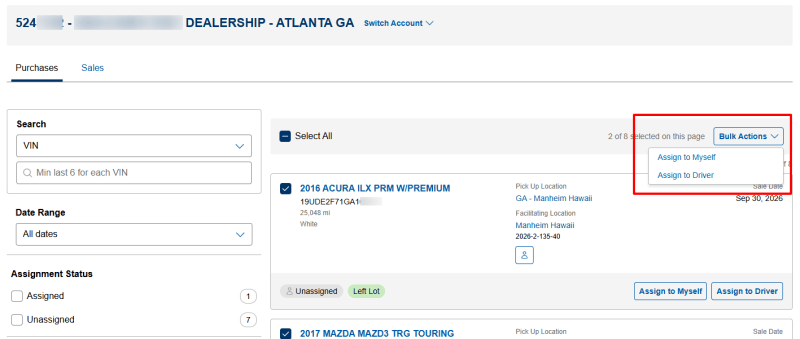
Each vehicle has an Assign to Myself and Assign to Driver button. Select Assign to Myself if you’re picking up the vehicle yourself, or Assign to Driver to hand it off to a driver on file.
To assign several vehicles at once, check the boxes next to each one and use the Bulk Actions menu instead, it offers the same two options.
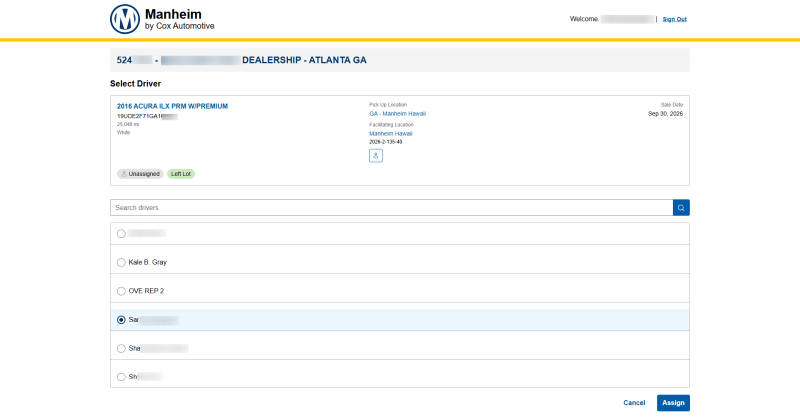
Selecting Assign to Driver (for one vehicle or in bulk) opens the Select Driver screen. Use the search field or choose a driver from the list, each entry shows the driver’s name and their carrier. Once you’ve selected a driver, click Assign.
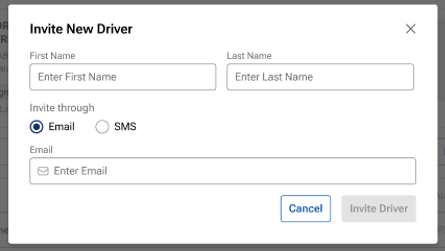
If your driver isn’t listed yet, select Invite New Driver next to the search field. Enter their first and last name, choose to invite them by Email or SMS, and enter their contact information. Select Invite Driver to send it.
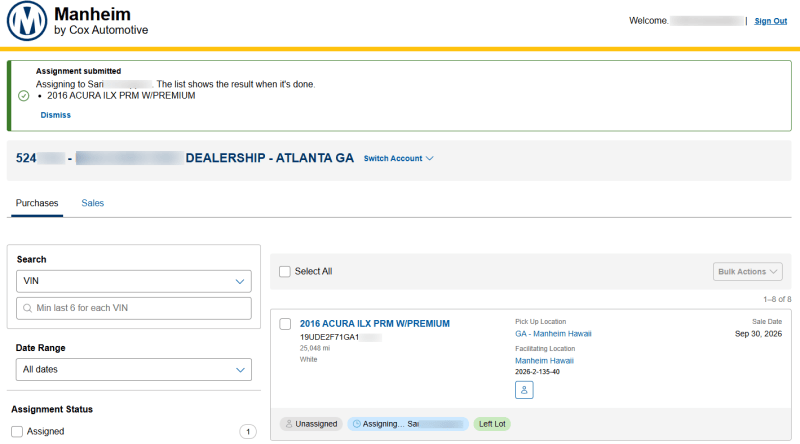
You’ll see an Assignment submitted confirmation, and the vehicle’s status updates to Assigning… [driver name]. This pill updates to Assigned once the driver accepts.
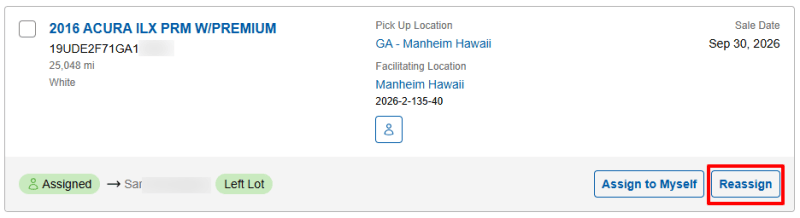
Once a vehicle is Assigned, the Assign to Driver button is replaced with Reassign. Selecting it opens the same Select Driver screen from Step 5. Submitting a reassignment shows the same confirmation banner and status pill, relabeled Reassigning….
Understanding Vehicle Statuses
Each vehicle shows two independent sets of status, they track different things and don’t replace each other:
- Assignment status – who’s responsible for pickup: Unassigned, Assigning… [name] (pending driver acceptance), or Assigned → [name].
- Pickup-readiness status – whether the vehicle can physically be picked up yet: Not Ready for Pickup (for example, pending payment or reconditioning), Available – Arrange Gate Release, or Left Lot.
Note: A vehicle can be Assigned to a driver while still Not Ready for Pickup, assigning a driver doesn’t change whether the vehicle is actually ready to leave.

